To change engine oil step by step, first, raise the vehicle and position a catch pan beneath the engine. Then, remove the drain plug and allow all the oil to drain.
Once drained, reinstall the drain plug, remove the old oil filter, and replace it with a new one. Lubricate the new filter and attach it by hand. Finally, remove the oil fill cap and add new oil. Remember to check the oil level and dispose of the old oil properly.
Changing engine oil regularly is essential to keep your engine running smoothly and prolong its lifespan. By following these simple steps, you can do it yourself and save money on maintenance costs.
Introduction To Diy Engine Oil Change
Changing your engine oil is crucial for maintaining your car’s performance and longevity. To complete a DIY oil change, you will need a few tools and materials. First, gather the necessary items, including motor oil, an oil filter, a wrench, and a drain pan. Additionally, make sure to have safety gloves and goggles. Raising the vehicle with ramps or a jack is essential for accessing the oil pan. Once the car is raised, locate the oil drain plug and filter, and position the drain pan accordingly. After draining the old oil and replacing the filter, add new oil to the engine. It’s important to check the oil level and ensure there are no leaks. Lastly, properly dispose of the old oil and recycle the oil filter. By following these steps, you can successfully change your engine oil at home.

Credit: www.instructables.com
Preparation Steps Before The Oil Change
Before beginning the oil change, safely raise your vehicle using ramps or jack stands. Position a catch pan underneath the oil drain plug to catch the old oil. Once the oil has drained completely, reinstall the drain plug and torque it to the manufacturer’s specifications. Next, remove the old oil filter, clean the mounting surface, and replace the O-ring. Lubricate the new filter, attach it by hand, and then remove the oil fill cap. Finally, add the new oil to the engine, ensuring it reaches the correct level. Dispose of the old oil and filter properly, and you’re done!
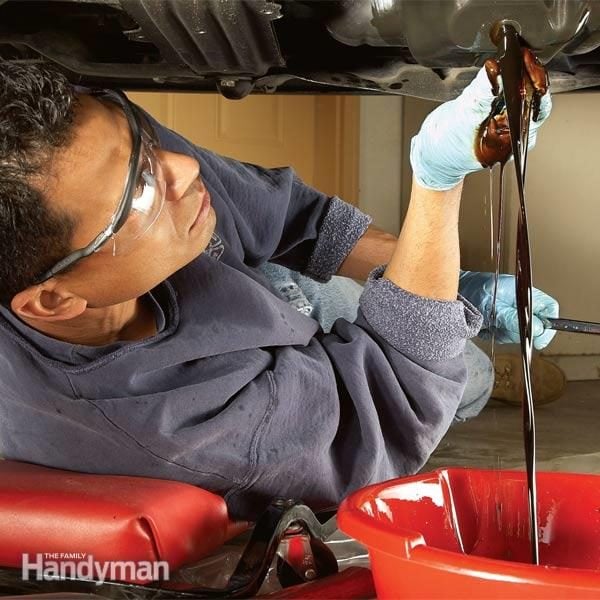
Draining The Old Engine Oil
To drain the old engine oil, start by positioning a catch pan and removing the plug. While the oil drains, inspect the vehicle. Once drained, reinstall the plug and remove the old oil filter. Clean the mount, add a new oil filter, and refill the engine with new oil.
To change the engine oil step by step, the first step is to drain the old engine oil. Start by locating the oil drain plug underneath your vehicle. This plug is typically located on the bottom of the engine oil pan. Use a wrench or socket to remove the plug and let the old oil drain into a catch pan. Make sure to properly dispose of the old oil afterwards. Once the oil has finished draining, you can proceed to remove the oil filter. The oil filter is usually located near the oil drain plug. Use an oil filter wrench to loosen and remove the old filter. Be careful, as some oil may still be present in the filter. After removing the old filter, clean the mounting surface and remove any old O-rings. Apply a thin layer of oil to the new oil filter’s gasket and hand tighten it onto the mounting surface. Do not overtighten, as this can cause damage. Next, reinstall the oil drain plug and torque it to the manufacturer’s specifications. Then, remove the oil fill cap and add the appropriate amount of new oil. Check your vehicle’s manual for the correct oil type and capacity. Finally, start the engine and check for any leaks.
Removing The Old Oil Filter
When changing engine oil, one of the important steps is removing the old oil filter. To locate and remove the oil filter, start by raising the vehicle and positioning a catch pan underneath. Then, remove the plug to drain the old oil and inspect the vehicle while it drains. Once the oil has drained, reinstall the drain plug and torque it properly.
Next, remove the old oil filter. Clean the mount and remove the old O-ring from the filter. It is important to lubricate the new filter and attach it by hand to ensure a proper seal. Finally, remove the oil fill cap and add new oil to the engine.
Remember to dispose of the old oil properly and check the oil level after completing the oil change. Following these steps will help you change the engine oil effectively and maintain the performance of your vehicle.
Installing The New Oil Filter
To install the new oil filter, first remove the old one and clean the mount. Then, lube the new filter and attach it by hand. After that, remove the oil fill cap and add new oil. This is an essential step in the process of changing engine oil.
To install the new oil filter, start by lubricating the new filter’s rubber gasket with fresh oil. Then, carefully screw the filter onto the engine by hand until it is snug. Do not over-tighten the filter, as it can cause damage to the gasket and create leaks. Once the filter is securely attached, wipe away any excess oil and debris from the surrounding area. Double-check that the drain plug is properly tightened and the oil filter is securely attached before adding new oil. With these steps complete, you are now ready to refill the engine with fresh oil to complete the oil change process.
Credit: www.familyhandyman.com
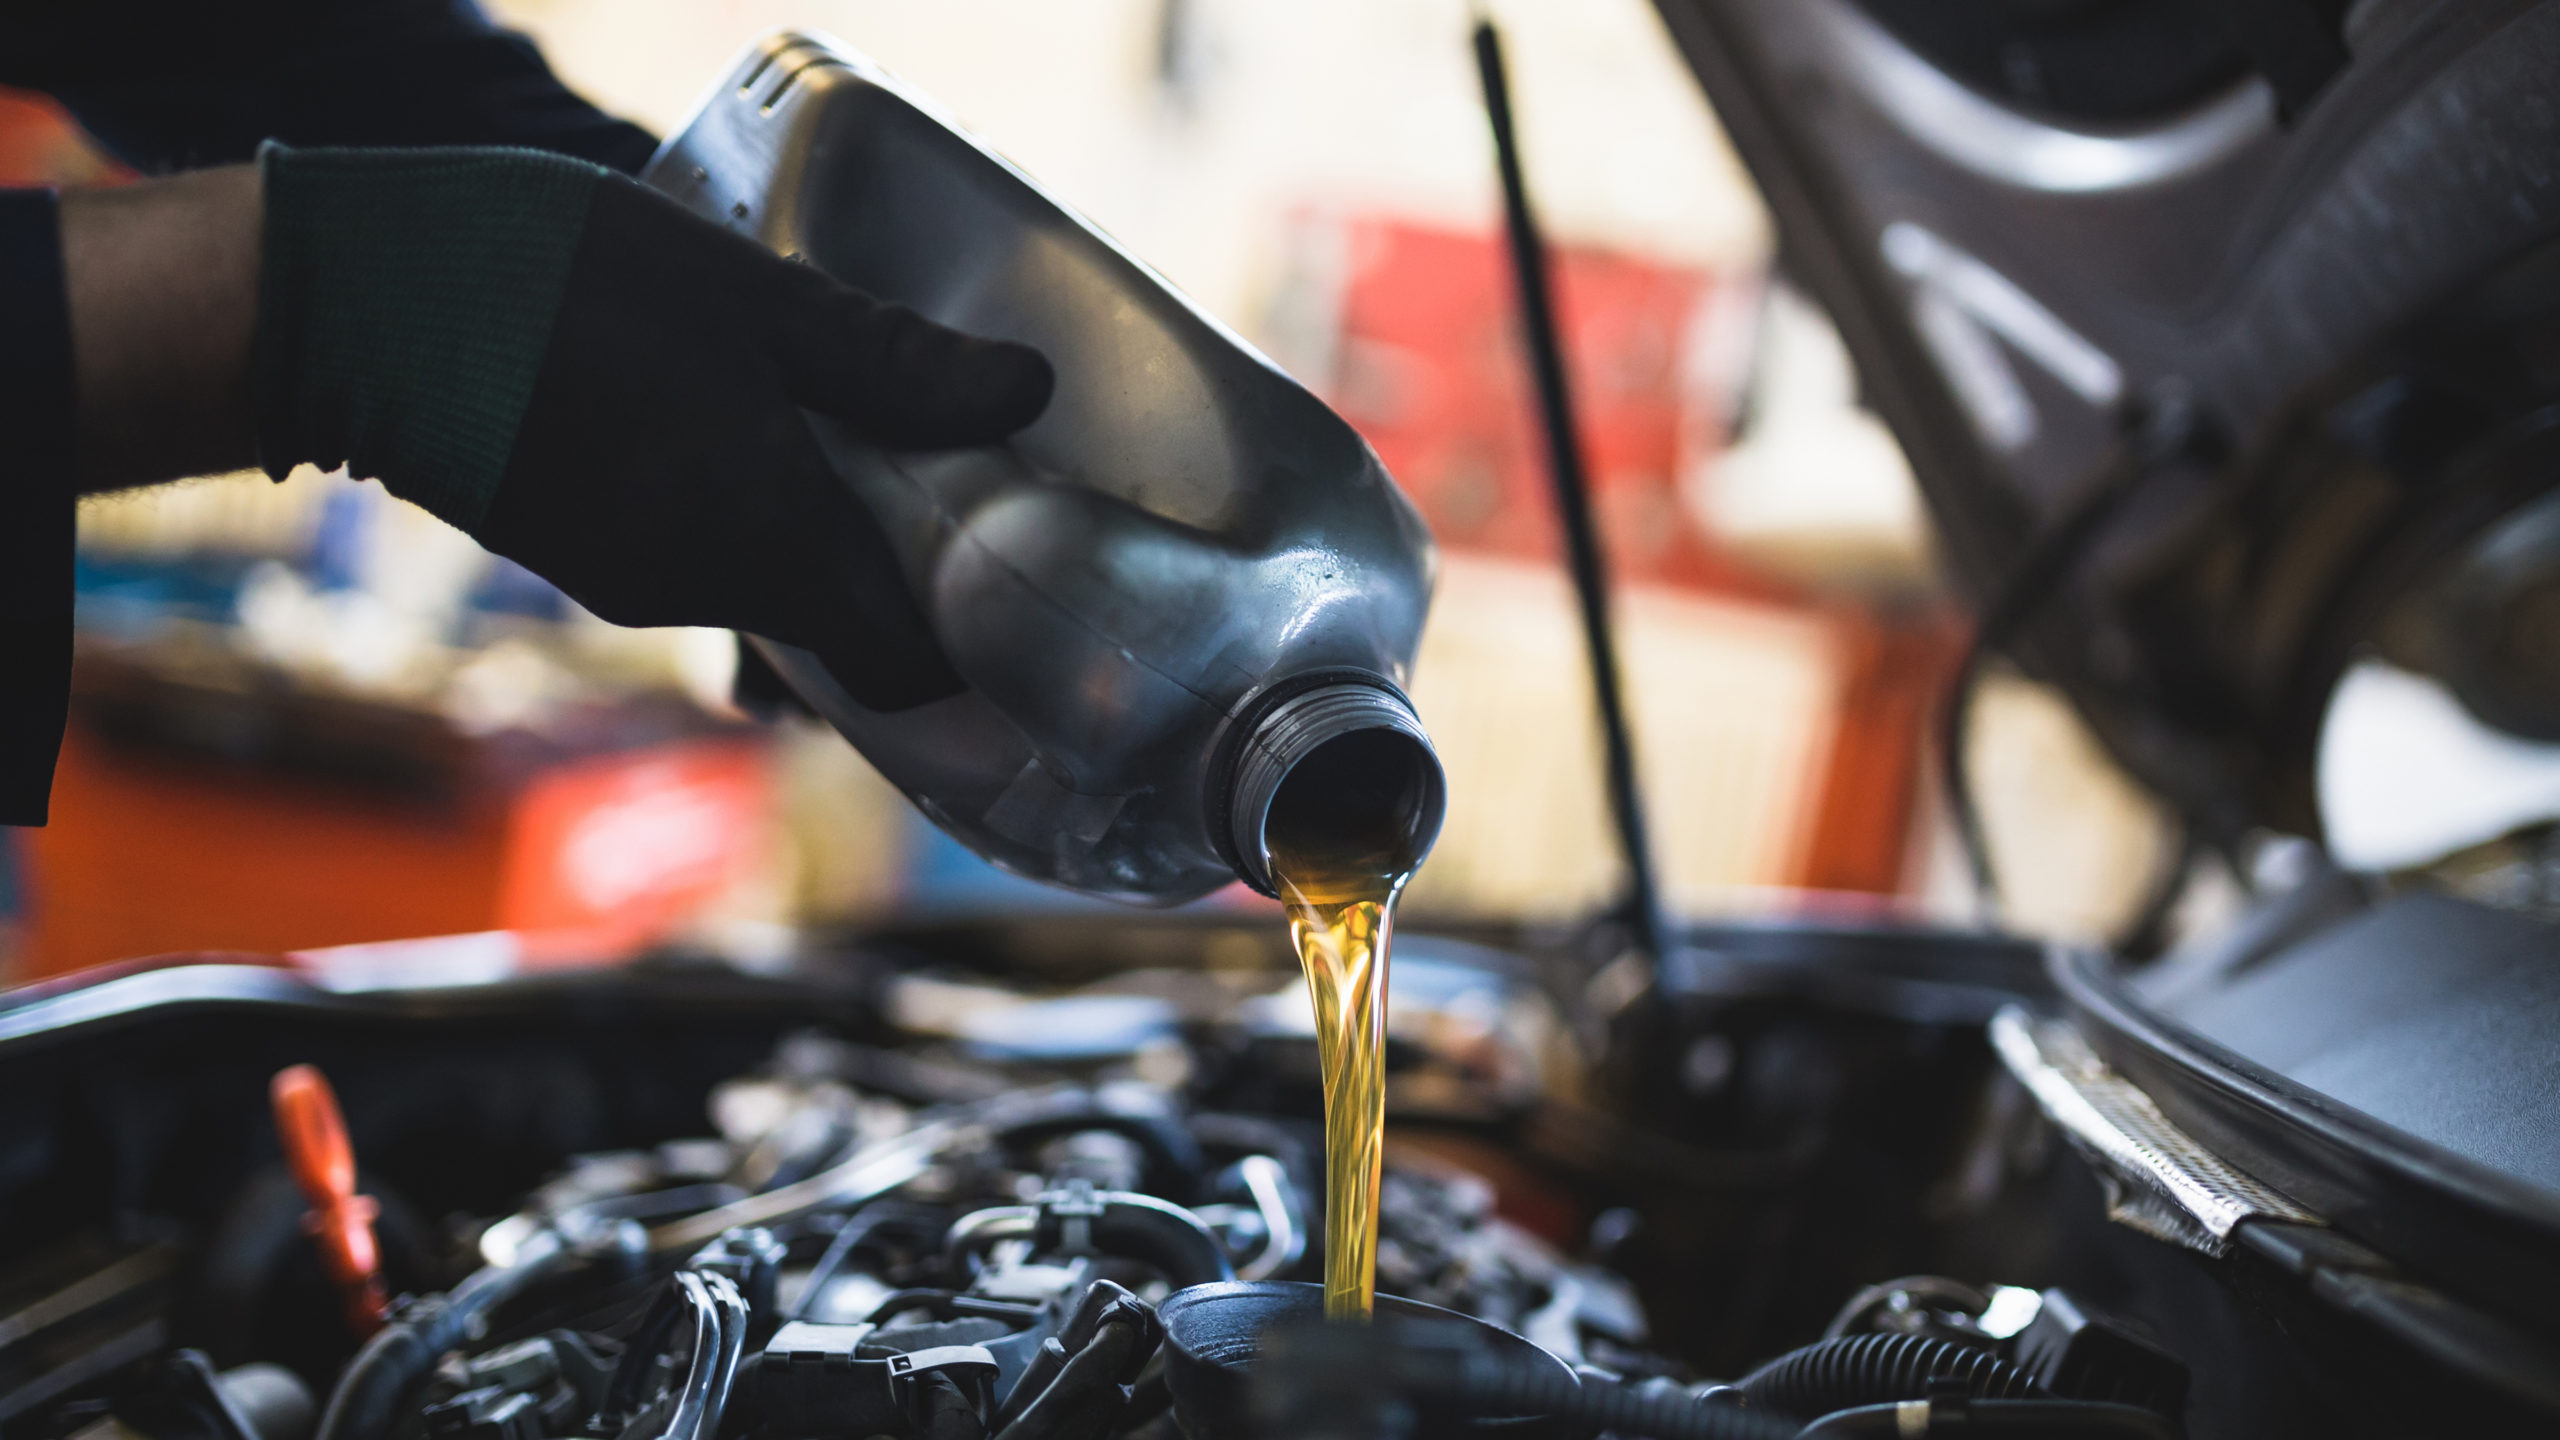
Refilling With New Engine Oil
Refilling with new engine oil is a crucial step in changing your engine oil. Start by locating the oil drain plug and filter, draining the old oil, replacing the filter, and then adding new oil while checking the level.
Final Steps And Checks
After completing the previous steps of changing your engine oil, there are a few final steps and checks you need to perform. First, start your engine and let it run for a few minutes to ensure that the new oil is properly circulated throughout the engine. While the engine is running, check for any signs of leaks around the oil filter, drain plug, or any other areas where oil could potentially leak. If you notice any leaks, tighten the affected area or replace the necessary parts.
Next, you’ll want to reset your oil life indicator. This step is important because it helps you keep track of when your next oil change is due. The process for resetting the indicator varies depending on the make and model of your vehicle, so consult your owner’s manual for specific instructions.
By following these final steps and checks, you can ensure that your engine oil change is completed properly and that your engine is running smoothly with fresh oil.
Credit: www.truecar.com
Proper Disposal And Cleanup
Proper disposal and cleanup are essential steps when changing engine oil. Recycling your old oil is a responsible and environmentally friendly way to dispose of it. You can take your used oil to a local recycling center or an auto parts store that offers oil recycling services. Make sure to store the old oil in a leak-proof container and transport it safely to the recycling facility. Cleaning up your workspace is also important to prevent any oil spills or accidents. Wipe down any oil spills or drips with absorbent materials and dispose of them properly. Remember to always follow local regulations and guidelines when it comes to disposing of engine oil and cleaning up after an oil change.
Frequently Asked Questions
What Are The 3 Steps To Changing Your Oil?
To change your oil, raise the vehicle and position a catch pan. Remove the plug and oil filter. Reinstall the plug, clean the mount, and attach a new filter. Add new oil and check the level.
How To Do An Oil Change By Yourself?
To do an oil change by yourself, follow these steps: 1. Raise the vehicle and position a catch pan beneath the oil plug. 2. Remove the plug and drain the oil. 3. Inspect the vehicle while the oil drains. 4.
Reinstall the plug and remove the old oil filter. 5. Clean the mount and remove the old O-ring. 6. Lube the new filter and attach it by hand. 7. Remove the oil fill cap and add new oil. 8. Test the oil level and dispose of the old oil properly.
What To Do Before Changing Engine Oil?
Before changing engine oil, make sure to raise the vehicle and position a catch pan. Remove the oil plug and filter, inspect the vehicle, and let all the oil drain. Reinstall the drain plug and torque it, clean the mount and remove the old O-ring, lube the new filter, and attach it by hand.
Finally, add new oil and remove the oil fill cap.
What Is Needed To Change Engine Oil?
To change engine oil, you will need motor oil and oil filter, wheel ramps and chocks, safety glasses and gloves. Other supplies include a catch pan, new O-ring, and new oil. Follow the steps to raise the vehicle, remove the plug, drain the oil, and replace the filter.
Conclusion
Changing your engine oil doesn’t have to be a daunting task. By following the step-by-step guide, you can easily maintain your vehicle’s performance and longevity. Regular oil changes are essential for optimal engine function, and with the right tools and knowledge, you can do it yourself with confidence.
Read More: