To remove antifreeze from engine oil, change the oil, oil filter, and add a flushing agent. It’s crucial to act promptly to prevent engine damage.
Antifreeze contamination in engine oil can lead to overheating and severe engine issues if left unaddressed. Changing the oil and flushing the system is essential to prevent further damage. Additionally, adding a flushing agent like Sea Foam or High Mileage oil can help remove any remaining traces of antifreeze from the engine oil.
Taking these steps promptly can help restore the engine’s performance and prevent costly repairs down the line.
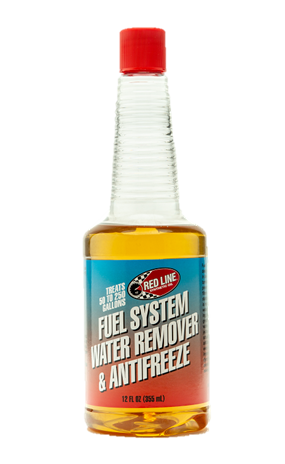
Credit: www.redlineoil.com
Signs Of Antifreeze Contamination In Engine Oil
Detecting antifreeze contamination in engine oil can be indicated by a milky appearance in the oil, higher than normal oil levels, or a sweet smell from the dipstick. To remove antifreeze from engine oil, change the oil, oil filter, and consider flushing the system to prevent damage to engine components.
Identifying antifreeze contamination in engine oil is crucial to maintaining your engine’s health. The mixture of these two fluids can cause severe damage to your engine and lead to costly repairs. Here are some signs to look out for:Identifying The Mixture
The first sign of antifreeze contamination in engine oil is a milky appearance in the oil. If you check your dipstick and see that the oil is no longer a translucent amber color, it may be contaminated with antifreeze. Another sign is a sweet smell coming from your engine. Antifreeze has a distinct sweet odor that can be easily detected. If you notice either of these symptoms, it’s time to take action.Risks To Your Engine
Allowing antifreeze to contaminate your engine oil can have serious consequences. The mixture can cause significant damage to your engine, leading to decreased performance and even complete engine failure. The antifreeze can cause corrosion and rust to build up in the engine, leading to further damage. Additionally, the mixture can cause engine bearings to fail, leading to costly repairs. To remove antifreeze from engine oil, it’s important to address the source of the leak first. Once the leak is fixed, you can drain the contaminated oil and replace it with fresh oil. Adding additives to the new oil can also help clean out any remaining contaminants. If the contamination is severe, you may need to flush the engine and cooling system to remove all traces of antifreeze. In conclusion, detecting antifreeze contamination in engine oil is crucial to maintaining your engine’s health. By addressing the issue promptly, you can prevent further damage and costly repairs.Initial Steps Before The Cleanse
Before you begin the process of removing antifreeze from engine oil, it’s essential to take some initial steps to ensure a safe and effective cleanse. These steps include implementing safety precautions and gathering the necessary tools and materials for the task.
Safety Precautions
- Ensure the engine is completely cool before starting the process.
- Wear protective gloves, eyewear, and clothing to prevent direct contact with the engine oil and antifreeze.
- Work in a well-ventilated area to avoid inhaling harmful fumes.
- Have a fire extinguisher nearby as a safety measure.
Gathering Necessary Tools And Materials
It’s crucial to have all the required tools and materials at hand before initiating the process. The following items are necessary for removing antifreeze from engine oil:
| Tools | Materials |
|---|---|
|
|
By adhering to these initial steps and precautions, you can ensure a safe and effective process of removing antifreeze from the engine oil, preventing any potential hazards and ensuring a successful cleanse.
Diagnosing The Source Of The Leak
To diagnose the source of the leak and remove antifreeze from engine oil, start by fixing the leak, draining the oil, and replacing it. Consider using additives and monitoring the oil condition to prevent any further damage. Regular maintenance is key to keep your engine running smoothly.
Common Culprits
When diagnosing the source of a coolant leak into the engine oil, there are several common culprits to consider. These include a leaking head gasket, a cracked engine block or cylinder head, a compromised oil cooler, or the accidental pouring of coolant into the oil fill. Identifying these potential issues is crucial in determining the appropriate course of action to resolve the problem.
Temporary Vs Permanent Fixes
It’s important to distinguish between temporary and permanent fixes when addressing a coolant leak into the engine oil. While adding new oil to the crankcase and using additives such as Sea Foam or High Mileage can provide a temporary solution, it’s essential to address the root cause of the issue for a permanent fix. This may involve replacing gaskets, repairing cracks, or resolving any other underlying mechanical issues contributing to the coolant leak.
Draining The Contaminated Oil
When dealing with antifreeze contamination in engine oil, the first step is to drain the contaminated oil properly. This process requires careful attention to prevent further damage to the engine and to ensure the safe disposal of the contaminated oil.
Best Practices
When draining the contaminated oil, it’s essential to follow best practices to minimize the risk of further damage to the engine. Here are some key best practices to consider:
- Allow the engine to cool down before draining the oil to prevent burns or injuries.
- Use proper safety equipment, such as gloves and safety goggles, to protect yourself from harmful chemicals.
- Ensure that the vehicle is on a level surface to facilitate proper drainage of the oil.
- Use a suitable container to collect the contaminated oil, and label it clearly for proper disposal.
- Follow the manufacturer’s guidelines for draining the oil to avoid any potential complications.
Environmental Considerations
Draining contaminated oil raises environmental concerns, and it’s crucial to address these considerations responsibly. Here are some environmental considerations to keep in mind:
- Dispose of the contaminated oil at a designated hazardous waste facility to prevent environmental harm.
- Avoid spilling the contaminated oil on the ground or in water sources to protect the environment.
- Consider using environmentally friendly oil-absorbent materials to clean any spills and prevent pollution.
- Follow local regulations and guidelines for the proper disposal of hazardous waste, including contaminated oil.
- Minimize the environmental impact by ensuring that the disposal process complies with all applicable laws and regulations.
Flushing The Engine
Flushing the engine is a crucial step in removing antifreeze from engine oil and preventing potential damage to the engine. This process involves using a flushing agent to thoroughly clean the internal components of the engine to ensure that all traces of antifreeze are eliminated.
Choosing The Right Flushing Agent
When selecting a flushing agent, it’s essential to choose a product specifically designed for removing contaminants from the engine oil system. Look for a high-quality flushing agent that is compatible with your engine type and is safe to use with the materials in your engine.
Step-by-step Flushing Process
- Begin by draining the contaminated engine oil from the system, ensuring that all the old oil is completely removed.
- Next, add the recommended amount of the chosen flushing agent to the engine oil. Follow the manufacturer’s instructions for the correct dosage.
- Start the engine and let it idle for the specified duration as per the flushing agent’s guidelines. This allows the flushing agent to circulate throughout the engine and break down any remaining antifreeze residue.
- After the specified time, turn off the engine and allow it to cool down before draining the flushing agent and any remaining contaminants from the system.
- Refill the engine with fresh, clean oil, ensuring that the flushing process has effectively removed all traces of antifreeze from the engine oil system.
Credit: www.reddit.com
Replacing The Oil Filter
When it comes to removing antifreeze from engine oil, replacing the oil filter is a crucial step in the process. The oil filter plays a vital role in ensuring that the engine oil remains free from contaminants, including antifreeze. Here are some essential considerations and tips for selecting an appropriate filter and installing it effectively.
Selecting An Appropriate Filter
Choosing the right oil filter is essential to ensure effective filtration of the engine oil. Look for a filter that is compatible with your vehicle’s make and model, and ensure that it meets the manufacturer’s specifications for filtration efficiency and capacity. Additionally, consider factors such as the filter’s construction, quality of materials, and compatibility with the type of oil being used.
Installation Tips
When installing a new oil filter, it’s important to follow proper procedures to ensure a secure and effective fit. Start by applying a thin layer of clean oil to the rubber gasket of the new filter to create a proper seal. Then, carefully thread the filter onto the mounting surface, ensuring it is tightened according to the manufacturer’s specifications. Avoid over-tightening, as this can lead to filter damage or leaks.
Refilling With Fresh Oil
To remove antifreeze from engine oil, drain out the existing oil, change the oil filter, and refill with fresh oil. It’s crucial to prevent damage to engine components by promptly addressing coolant mixing with the oil. Regular maintenance helps avoid costly repairs and ensures optimal engine performance.
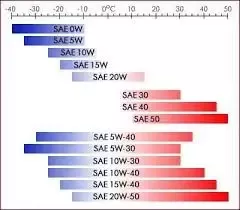
Recommended Oil Types
When it comes to refilling the engine with fresh oil after removing antifreeze, it’s crucial to use the recommended oil types. Always consult your vehicle’s manual or a trusted mechanic for the correct oil viscosity and specifications.
Correct Filling Techniques
Once you have the right oil, follow correct filling techniques to ensure optimal engine performance. Here are some important steps to consider:
- Start by securely placing a funnel into the oil filler hole.
- Slowly pour the fresh oil into the engine, pausing occasionally to allow it to settle.
- Use a dipstick to check the oil level and ensure it falls within the recommended range.
- Tighten the oil filler cap securely to prevent leaks.
- Dispose of the used oil responsibly at a designated recycling center.
Credit: www.mobil.com
Post-cleanup Checks
To remove antifreeze from engine oil, conduct post-cleanup checks by changing the oil and oil filter. Flush the cooling system to prevent damage. Ensure to use additives to maintain engine oil condition. Regularly monitor for any coolant leaks to prevent future contamination.
Post-Cleanup Checks: After successfully removing the antifreeze from your engine oil, you need to carry out some post-cleanup checks to ensure that your engine is functioning optimally. Here are some essential checks to perform. Inspecting for Leaks: The first thing you want to check is if there are any leaks in your engine. Look for any visible signs of leakage around the engine oil pan, oil filter, and drain plug. You can also check for leaks by placing a clean piece of cardboard under the engine for a few hours and observing if there are any oil spots on it. If you notice any leaks, fix them immediately before adding new oil. Engine Performance Monitoring: After adding new oil, it is essential to monitor your engine’s performance to ensure that there are no issues. Check the oil pressure gauge or light to ensure that the oil is adequately circulating through the engine. Also, observe the engine’s temperature gauge to ensure that it is not overheating. If you notice any abnormalities in the engine’s performance, take your car to a mechanic for a thorough checkup. In conclusion, post-cleanup checks are crucial for ensuring that your engine is functioning correctly after removing antifreeze from the engine oil. By inspecting for leaks and monitoring the engine’s performance, you can catch any issues early and prevent further damage to your engine.Preventive Measures
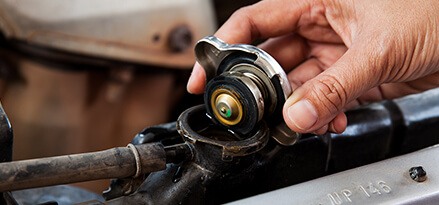
Regularly inspect the cooling system for leaks or damage.
Replace the coolant according to the manufacturer’s recommended schedule.
Check the engine oil for any signs of coolant contamination during routine oil changes.
Ensure proper installation and maintenance of gaskets and seals to prevent coolant leaks.
When To Seek Professional Help
If you notice persistent coolant leaks or a milky appearance in the engine oil, seek professional assistance immediately.
When in doubt about the severity of coolant contamination, consult a mechanic for thorough inspection.
Understanding The Costs
When deciding between DIY and professional service for removing antifreeze from engine oil, consider the following:
- DIY: Lower initial cost, but requires time and effort.
- Professional Service: Higher upfront cost, but ensures proper and thorough removal.
Investing in proper removal of antifreeze from engine oil can lead to long-term savings:
- Prevent Damage: Avoid costly engine repairs due to antifreeze contamination.
- Improved Engine Performance: Proper removal can enhance engine efficiency and longevity.
Frequently Asked Questions
How To Flush Antifreeze Out Of Engine Oil?
To flush antifreeze out of engine oil, first fix the source of the leak. Then, drain the engine oil and change it. Additives like Sea Foam or High Mileage can be used. If the oil is clear and normal, there’s no coolant in the crankcase.
It’s important to change both fluids if the coolant has mixed with the engine oil and flush the cooling system to remove any remaining coolant.
What Happens When Antifreeze Gets In Your Oil?
When antifreeze gets in your oil, it can cause engine overheating and severe damage if not fixed. To remove it, change the oil and coolant, and flush the cooling system. Prevent further issues by fixing the source of the leak.
How To Separate Antifreeze From Oil?
To separate antifreeze from oil, change the engine oil and coolant, and flush the cooling system to remove any remaining coolant. If coolant has mixed with the engine oil, it can damage engine components if not addressed promptly. Additionally, adding new oil and a cleaning additive can help remove any remaining traces of coolant.
How To Fix Coolant Mixing With Engine Oil?
To fix coolant mixing with engine oil, first fix the leak source. Then drain and change the engine oil, and flush the cooling system to remove remaining coolant.
Conclusion
To effectively remove antifreeze from engine oil, follow the steps mentioned in the blog post. Properly draining and changing the oil is crucial. It’s essential to address any leaks and use additives if needed. Ensuring the engine oil is in good condition is key.
Take care of your engine to prevent future issues.